How to Reset Geeni Camera Effortlessly?
Indeed, Geeni security cameras are impeccable surveillance devices, packed with numerous incredible features. These security devices are ideal for keeping a watchful eye on your premises 24*7. Besides its excellent features, some users also face issues with these devices. Therefore, to ensure the optimal functioning of your device, you must know how to reset Geeni camera.
Therefore, this guide presents you with detailed steps to reset your camera easily. Additionally, you will learn about the different ways to perform the Geeni camera reset. Further, this blog sheds light on the key reasons to reset your camera. So, stay focused here for more information!
Why to Factory Reset Geeni Camera?
However, there are multiple reasons behind resetting Geeni camera. These key reasons are given below:
- Security and privacy concerns
- Forgotten admin details
- IP conflicts
- Multiple Login denials
- Firmware issues
- Technical glitches and bugs
- Incorrect configuration
- Hardware issues, etc.
How to Reset Geeni Camera in Different Ways?
After you identify the key reasons to reset Geeni camera, now you must opt for an appropriate method to proceed with the stepwise process. Generally, there are two ways to reset the camera, i.e., physical/manual reset via the reset button and using the Geeni app. If you don’t know how to reset Geeni camera, then have a closer look at the below steps:
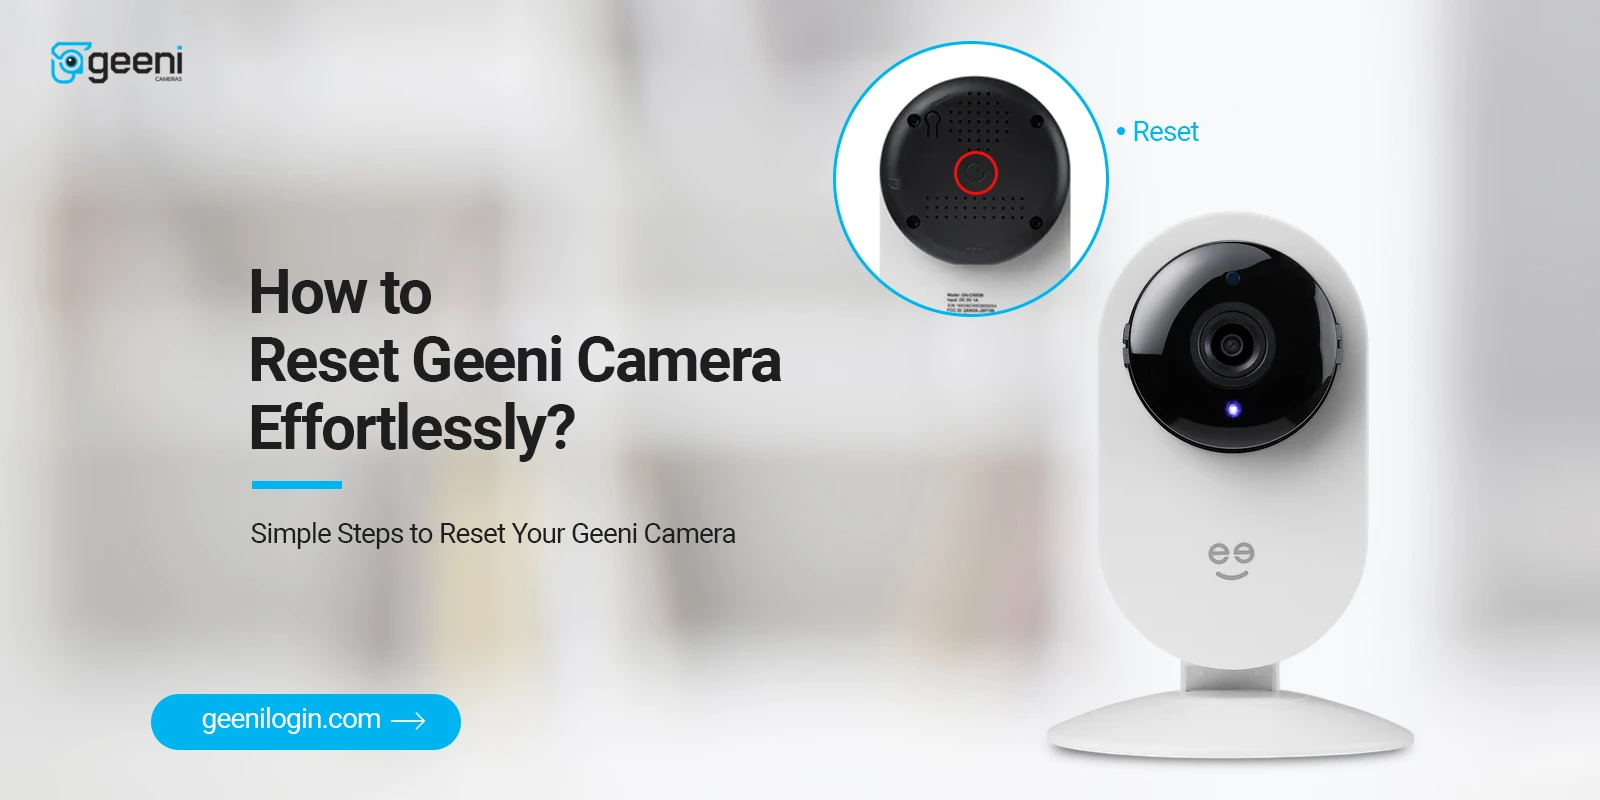
Reset Using the Button Method

- Initially, make sure that your Geeni security camera is connected to the power source.
- Then, locate the reset button on the back side of your camera.
- Further, press and hold this button for around 5 seconds.
- Release this button when you hear a voice prompt.
- Finally, the Geeni camera reset ends here.
Using the Geeni App For the Reset
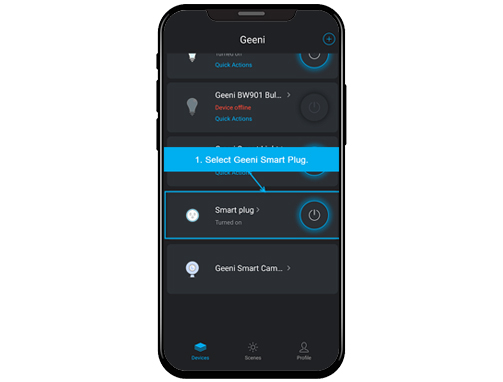
- Primarily, confirm that your smartphone is connected to the existing home network.
- Then, update or download the Geeni app on your smartphone.
- After that, open the app and access your Geeni account using valid admin details.
- Then, you reach the home dashboard of your security device.
- Hereon, tap on the three dots appearing on the top-right corner of the app.
- Now, navigate to Settings, scroll down, and select the ‘Remove Device’ option.
- Then, confirm the reset and your camera reset initiates.
- At last, the Geeni camera is removed from the app, and factory reset Geeni camera finishes.
Why is My Geeni Camera Not Working After Reset?
Sometimes, users face multiple issues when resetting Geeni camera. These issues mainly arise due to network connectivity issues, power outages, wrong admin details, app issues, etc. However, if you don’t follow proper procedure, your camera may not reset to its factory settings. Therefore, follow the below-given troubleshooting tips to eradicate these issues:
- Most importantly, you must ensure a stable internet connection. For that, you can use the ethernet cables.
- Additionally, confirm the power supply and ethernet cable connections.
- Check that power cords, adapters, and wall sockets are working well.
- Moreover, verify the Geeni camera login details when accessing the admin panel.
- Eliminate the network barriers like sheer curtains, baby monitors, furniture, etc.
- Use the latest update of the Geeni app for resetting your security camera.
- In addition, clear the unwanted app data and temporary files from your device.
- Check the firmware updates on your camera and download the latest and compatible firmware file only.
- Resolve the IP conflicts by using the different network channels and subnet masks.
- Follow the proper instructions and method to reset your device. You can refer to the user manual or guide to learn the complete steps.
- Opt for the alternate method if you fail to reset the camera with one method.
If you want to know more about this device, visit our official website!